
In continuation of my previous post about the perfect peanut butter cookie, this is the cookie that started it all. Simple, yet oh-so-popular, these cookies have won the hearts of all of Boy's coworkers (if they had it their way, I'd be living my dream cooking all day long). I've used these to say sorry (and surprise, my apology was accepted). These cookies have been notorious to show up at parties such as the 2007 Super Bowl party, 2007 Fourth of July and most recently, the 2007 Blue Angels party. World famous for their simpliciy and bite size happiness from the made-in-heaven pairing of peanut butter and chocolate, these cookies certainly have their way with people.
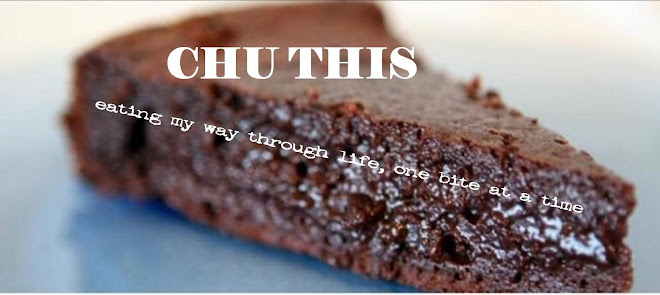
I've always been keen on pointing out the difference between baking and cooking. "Yes, I love sweets, but I'm really into COOKING not BAKING, and yes there is a big difference." I swore up and down that I'd keep to my cooking and leave baking to the cafe down the street. However, since baked goods lend themselves to office treats much better than, say, crabcakes or lamb chops, I've found myself pseudo-baking recently. My efforts were validated the day I brought in the Chocolate Decadence Cake (see banner at top). Needing some code from one of the developers quickly, I offered to send over a piece of cake in exchange for the code. I think the code was in my inbox before I could even finish the sentence. So, yes, baking does pay off.
With my recent mini-adventures into baking, I've quickly discovered and read a few tips of the trade, which I offer here:
Prep
Make sure the ingredients are at the proper temperature. I wouldn't have known this one (why can't I just microwave the butter to make it easy to mix quicker?). I delight in finishing things quicker than expected, so I'm always looking for a shortcut, and perhaps this is one of my qualms with baking - shortcuts are generally bad. This usually applies to eggs and butter. The butter is suppose to be between 65 and 70 degrees - if Goldilocks claims the butter is too soft, it won't become fluffy when you beat it with the eggs, which leads to greasy cookies. If Golidocks says the butter is too firm, you also won't be able to cream the butter properly since the sugar can't work its way into the butter to aerate it. Also bad. For eggs, they incorporate better into the batter when they are room temperature.
Mix
Cream butter and sugar properly - When you cream the butter and sugar together, you cut the sugar into the butter, creating little pockets of air in the fat - aerating it. This air determines if you will get a tender, light cookie or a dense, leaden one, thus the butter at the right temperature bit. But how do I know when it's creamed properly? As you're beating, watch for the butter and sugar to start increasing in volume as well as becoming lighter in color. Watch carefully so you don't overbeat (mixture becomes shiny).
Shape
Keep 'em uniform - The cookie scoop my dad gave me was a godsend. This will make sure that the cookies bake the same, hopefully eliminating those random "extra crispy" cookies.
Bake
Be aware of the cookie sheet - I bought some heavy duty Cuisinart sheets recently that won't warp like my other ones have in the past. These have rims though, which can change the baking time of the cookies as the heat doesn't get to the cookies evenly. The ideal cookie sheets are sturdy (won't warp in the oven to make for uneven baking) and rimless (rims won't block the heat) and light colored (dark colors may cook the bottoms of the cookies before the tops are done).
Parchment paper (not for chicken) - My roommate somehow got the idea to use my parchment paper (which I think is expensive) to cover chicken as he pounded the chicken. And he used the LAST BIT, leaving me without parchment paper three days later when I baked cookies. Having to go sans parchment paper, I can't emphasize what a difference the parchment paper makes. Suck it up and buy some.
Don't blame the oven - No two ovens are the same. You should learn your oven (I'm still learning mine). To help combat uneveness, rotate the cookie sheets halfway through and also switch racks. After rotating (if it takes a bit of time), be aware that you may need to bake for a little longer.
Check-in early - I always set the timer for a couple of minutes before the estimated time. Don't check too often or you'll lower the temperature too much. Still, you want to make sure that you...
Remove cookies before they are done - Cookies usually don't LOOK done when they are perfect and those that look perfect usually turn to rock after cooling. You can always put them back in the oven.
Don't reuse hot sheets - I'm a hypocrite on this one, but I've read it time and time again. Cool off the sheets with cold water before reusing - otherwise, the hot sheet can melt the dough before it's allowed to bake properly.
Back to the cookies - Since the Boy and myself aren't huge fans of chocolate, I'm thinking about trying just the dough and making them in the shape of the typical peanut butter cookie. Another thought was adding the ground, roasted and salted peanuts from the previous recipe to add another peanut kick to these cookies. You can also substitute the milk chocolate Hershey Kiss for one of the many varieties of Kisses available, or even go for a Reese's Peanut Butter cup minature if you're a peanut butter fanatic.
One last note - apparently they sell unwrapped Hershey Kisses, but I've yet to find them in the store. If you do, let me know where! Otherwise, be sure that you have the Kisses unwrapped before the cookies come out of the oven so you can place them on the cookies while the cookies are hot.
Peanut Butter Kiss Cookies
1 3/4 c. flour
1/2 c. sugar
1/2 c. brown sugar
1 tsp. baking soda
1/2 tsp. salt
1/2 c. butter
1/2 c. peanut butter
1 egg
2 tbsp. milk
1 tsp. vanilla
Extra sugar in a small bowl to coat cookie dough
Prep
1. Pre-heat oven to 350.
2. Unwrap hershey kisses.
Mix
3. Combine and mix dry ingredients (flour, sugar, brown sugar, baking soda, salt).
4. Add butter, peanut butter, egg, milk and vanilla. Mix until thoroughly combined. The dough should be soft, but easily made into dough balls.
Shape
5. In a small bowl (or plate), pour about a 1/2 cup of granulated sugar. As you shape the dough balls, give them a small toss in the sugar bowl to evenly coat the cookie dough. I've found that using a bowl to toss/swirl the dough makes this much quicker and more even than rolling the dough around a plate.
6. Place the dough balls about an inch apart on a parchment paper covered baking sheet. These cookies don't expand too much during baking, but when you add the Hershey Kiss, the dough flattens and expands a bit.
Bake
7. Bake for 8-10 minutes. These will turn slightly brown when done.
8. Remove from oven immediately. Place one Hershey's Kiss on each cookie and press down gently. Leave the cookies in safe place to cook all the way. The chocolate melts as it sits on the cookie and I've had plenty of mishaps trying to mess with the cookies before completely cool.


1 comment:
Oi, achei seu blog pelo google está bem interessante gostei desse post. Gostaria de falar sobre o CresceNet. O CresceNet é um provedor de internet discada que remunera seus usuários pelo tempo conectado. Exatamente isso que você leu, estão pagando para você conectar. O provedor paga 20 centavos por hora de conexão discada com ligação local para mais de 2100 cidades do Brasil. O CresceNet tem um acelerador de conexão, que deixa sua conexão até 10 vezes mais rápida. Quem utiliza banda larga pode lucrar também, basta se cadastrar no CresceNet e quando for dormir conectar por discada, é possível pagar a ADSL só com o dinheiro da discada. Nos horários de minuto único o gasto com telefone é mínimo e a remuneração do CresceNet generosa. Se você quiser linkar o Cresce.Net(www.provedorcrescenet.com) no seu blog eu ficaria agradecido, até mais e sucesso. (If he will be possible add the CresceNet(www.provedorcrescenet.com) in your blogroll I thankful, bye friend).
Post a Comment